这篇文章来源于DevicePlus.com英语网站的翻译稿。
承接第1部分的内容,我们将在第2部分中继续使用Arduino制作有趣的电子产品。在上文中,我们从组装电路进行到加速度计测试,这次,我们将完成硬件的制作。这个独特的电子套件创意来自艺术家平原真,他的作品主要以“关系”为主题。大阪艺术大学副教授平原先生使用电脑和电子设备制作了许多媒体艺术作品。近年来,他主要研究如何使用木材和石头等天然材料制作3D作品。那么,现在让我们一起来探索“基于Arduino的太阳能电池板数字饲养箱”的第2部分(也是最后一部分)。
硬件
步骤分解
我们首先从组装外部组件和安装电子元器件开始。过程如下:
- 用激光切割材料
- 组装主体
- LED接线及安装
- 安装太阳能电池板
步骤1:用激光切割材料
材料是用激光加工机切割出来的。外部是3mm厚的椴木胶合板。从左边起依次为:LED表面,太阳能电池板表面,两个侧面和LED底座。LED底座上的刻线用于在粘贴LED时使其对齐。
可能很难看清楚,其实在下图的右上角有一个1mm厚的半透明亚克力板。它用于帮助扩散来自全彩串行LED灯带的光。

请下载并使用以下链接中提取的数据。按照红线切割,按照黑线刻画标记。在实际工作时,请务必根据您使用的激光机来调整设置。
>> CutData.ai
步骤2:组装主体
在两侧边缘涂上木工粘合剂,然后将这四块板和LED以及太阳能电池板粘贴在一起。粘合后立即夹紧并固定到位。如果您担心粘合的强度不够,可以将一小块木头贴在粘合位置的拐角处进行加固。

步骤3:LED接线及安装
将灯带分割成5个单独的全彩LED灯带。电极中间可以用钳子剪开。将跳线保留在临时接线时的位置。

将单独的全彩串行LED灯带沿对准标记粘贴到底座上。这个时候,请注意在临时接线时所连接的跳线应在左上角位置,且电极方向与划线箭头方向一致。
各个全彩串行LED灯带的电极之间通过硬跳线进行连接。电极之间的内侧距离约为11mm,中间距离约为17mm,外侧距离约为23mm。左上方连接跳线的LED编号为0,其余LED编号按照连接顺序递增,因此右下方LED编号为24。

现在,我们戳一下面包板上的跳线,然后检查其是否断开。将LED示例程序([Adafruit NeoPixel]> [Simple])中NUPIXELS的值从16改为25即可完成。如果LED都呈绿色亮起,就表示没有问题。
#define NUMPIXELS 16
↓
#define NUMPIXELS 25
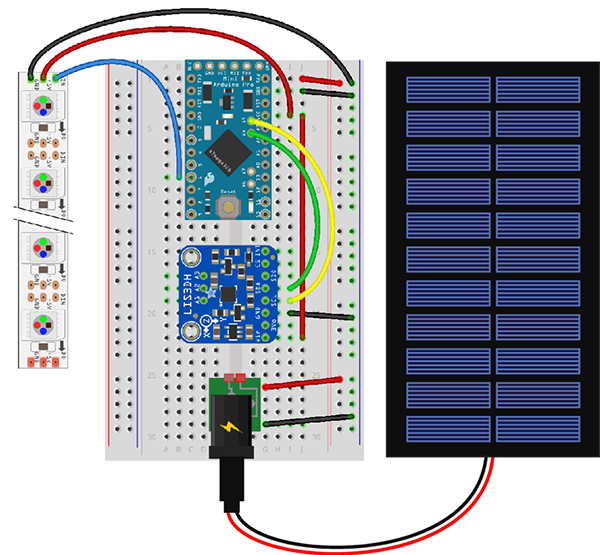
步骤4:安装LED底座和面包板
依次叠加椴木胶合板(LED表面)、亚克力板、LED底座,然后用四个螺丝将它们固定到位。连接着全彩串行LED灯带的跳线应从板之间布线到内部。垫片使用非导电垫圈(M2)。由于间隙越厚越利于光的扩散,因此请根据自己的需要将间隙距离调整到约0.5mm至1mm之间。


将面包板连接到LED底座的中心。面包板的背部也有双面胶带,所以将离型纸撕下并将面包板贴上。请注意,如果您在安装后尝试移除面包板,那么里面的引脚将会脱落。将连接了全彩串行LED灯带的跳线插入面包板的电源、GND和6个引脚。

步骤5:用3D打印机制造太阳能电池板托架
用于固定太阳能电池板的托架通过3D打印技术制造。从下面的链接下载STL文件,并使用3D打印机打印托架。请打印出两个相同形状的托架,层压设置分别为粗糙和精细。

首先,用螺丝将一个托架固定在太阳能电池板顶部的内侧。3D打印机打印出来的托架上有一个未切割的2mm孔。用M2平头螺钉钻孔并将其固定。

接下来,在将太阳能电池板插入上侧托架的同时,用螺钉固定下侧托架。

步骤6:硬件制作完成!
将太阳能电池板DC插头插入面包板上的DC插座,此时所有的硬件应已经准备齐全。


然后,为了在Arduino Pro Mini 328上写入草图,移除下侧的托架,并拆下太阳能电池板。
草图
完成步骤
接下来,我将详细介绍写入草图的所有步骤:
- 管理库
- 以二维数组方式管理LED
- 种草
- 养动物并管理多种生物
- 动物在加速度计发生感应时增殖
管理库
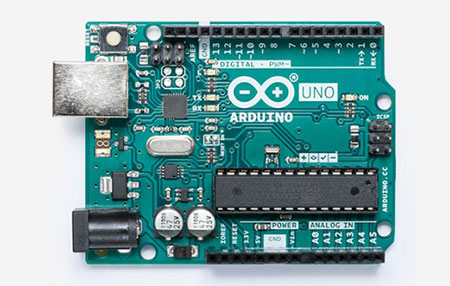
我们将使用Adafruit提供的Neo Pixel和加速度计LIS3DH库。此外,我们将定期使用一个名为[MsTimer2]的指定函数。从Arduino IDE菜单中选择[Sketch]> [Include Library]> [Manage Library]来打开库管理器。在搜索字段中输入[MsTimer2],然后从显示出来的选项中进行选择并安装。

管理矩阵中的LED
LED灯带从0到24连续编号,但为了更容易表达动植物的位置,可以换为用横纵坐标来表示。LED编号存储在二维数组中。
| … | |
| int ledMatrix[WIDTH][HEIGHT];//2D array to record LED layout and number | |
| … | |
| ledMatrix[0][0] = 0;// 0 is、x=0, y=0 | |
| ledMatrix[1][0] = 9;// 9 is、x=1, y=0 | |
| ledMatrix[2][0] = 10;// 10 is、 x=2, y=0 | |
| ledMatrix[3][0] = 19;// 19 is、 x=3, y=0 | |
| ledMatrix[4][0] = 20;// 10 is、 x=4, y=0 | |
| … |
查看源代码 GitHub托管项目ledMatrix.ino。
种草
创建一个5 x 5的二维数组,该数组用于保存草的生长情况以及每帧中在随机位置种草。
| … | |
| int grassMatrix[WIDTH][HEIGHT];//2D array that keeps grass growing | |
| … | |
| int rndX = random(WIDTH); | |
| int rndY = random(HEIGHT); | |
| grassMatrix[rndX][rndY] += random(GRASS_GROWTH_POTENTIAL + 1); //Grows grass at random locations | |
| … |
查看源代码 GitHub托管项目grassMatrix.ino。
养动物
定义一个结构来处理和保存动物的参数。动物信息通过这一系列动物结构进行管理。动物结构有一个生/死标志,如果它没有死,那么会进行移动和觅食。接下来,将一只动物移向最茂密的草丛。当进入草地部分时,动物开始进食,并将草的生长水平设置为0,然后将这一部分的摄入添加到动物的体能中。同时,每一帧都会消耗一定的体能,如果体能降到0,动物就会死亡。
增殖动物
有两种方法可以增殖动物。一种是当主体倒下以及检测到一定程度的振动时。这种情况下,一个随机颜色的新动物将会出现在屏幕中间。
另一种是当动物吃草并且体能达到极限时。动物的体能将会减半,并增加相同颜色的动物数量。
整体草图

总结
做得好!您已经完成了!如果您将太阳能电池板朝向太阳,我相信光点会开始移动。当它开始移动寻找食物时,看起来确实像一个生物。那么,您对通过重写种草方式和动物的运动方式来创建自己的原始生态系统有何感想呢?
这就是对这个系列的总结了。通过这两部分内容,我们学习了如何使用Arduino制作由太阳能电池板供电的数字饲养箱。我希望每个人都可以利用这些知识来制造一些真正独特的东西。
DevicePlus 编辑团队
设备升级版适用于所有热爱电子和机电一体化的人。