第一部分:用跳绳测试仪解决运动不足问题!
第二部分:用SensorMedal检测跳跃次数并在显示器上显示
大家好,我是吉田!
本连载旨在制作一款用来解决运动不足问题的跳绳设备。本文是第三部分,前面已经实现了通过加速度传感器对跳跃次数进行计数,本文将介绍将其数据保存在Google Sheets中并进行处理的步骤。如果能够了解自己的跳跃次数、时间、消耗的总热量等,可能会增加今后坚持锻炼的动力。现在就动手开始做吧!

本部分所需部件
跳绳

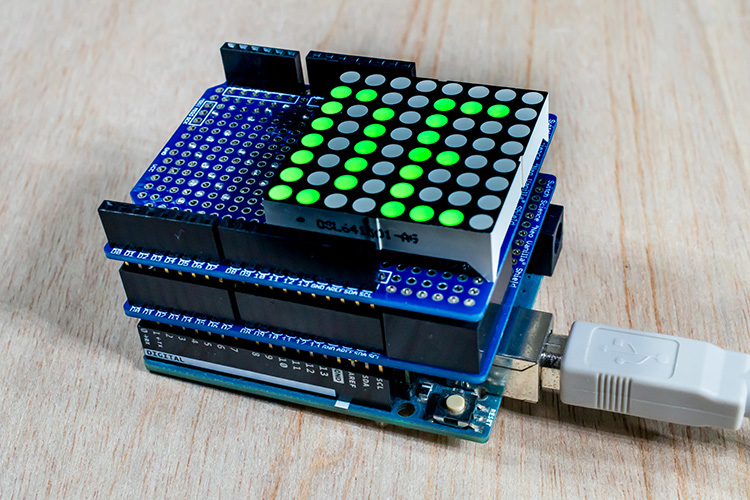
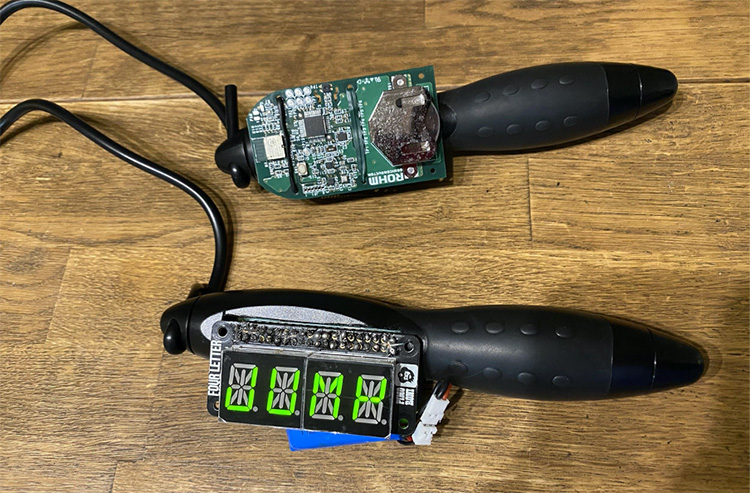
ROHM SensorMedal(SensorMedal-EVK-002)

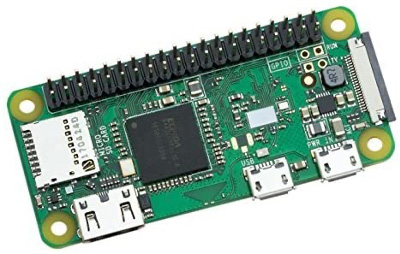
Raspberry Pi zero(Raspberry Pi Zero W)
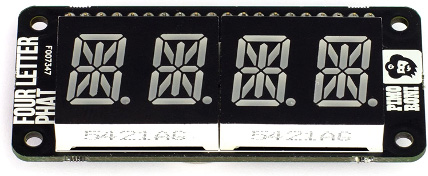
FOUR LETTER LED PHAT
本部分的流程
1.设置Google Sheets
当我们实现了跳绳计数后,就很希望能将次数等数据保存下来,以便随时查看以往的跳跃次数。
为此,让我们将跳跃次数等数据保存在Google云端的电子表格中吧。Google的云服务可以在一定程度内免费使用,因此可以随时开始使用。
首先,需要访问下面的Google控制台。单击下面的链接可以注册您的Google帐户并登录开始使用:
https://console.developers.google.com/
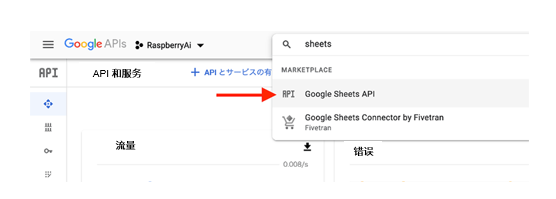
您Google帐户的初始设置完成后,可以在控制台中搜索名为“Sheets”的API,就会出来Google Sheets API,请选择它。
现在,点击左侧的蓝色按钮“启用”,启用Sheets API。

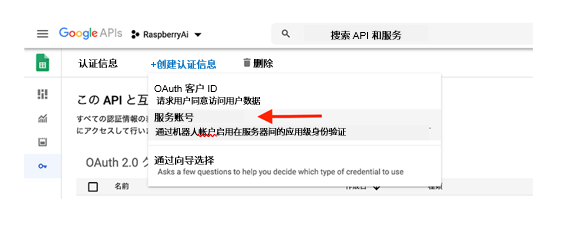
然后将光标移到左侧菜单中的“认证信息”。
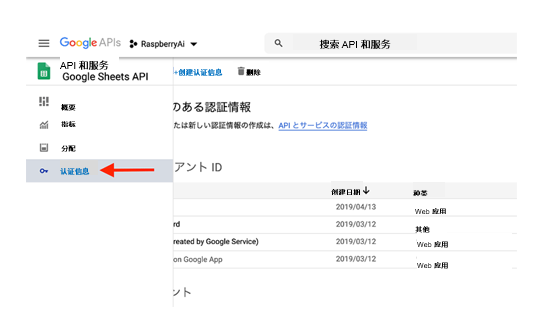
从认证页面顶部的“创建认证信息”中选择“服务帐户”。
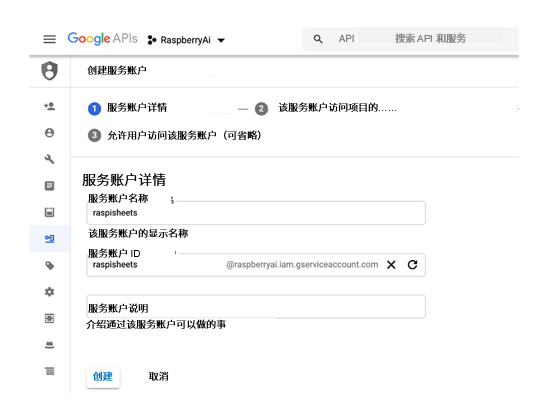
在服务帐户创建页面上,输入适当的帐户名称和ID,然后点击“创建”。
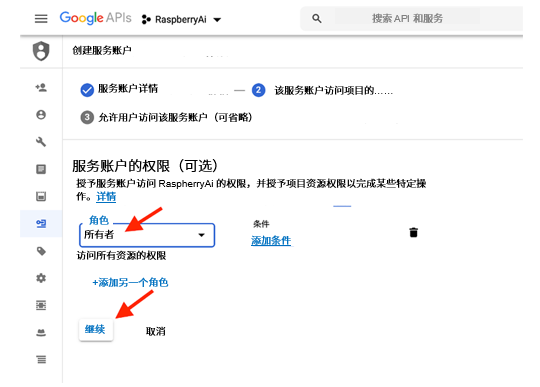
即使“允许访问”,也需要授予项目所有者等权限并点击“继续”。
这样,就创建了服务帐户。现在,单击如下所示的创建秘钥按钮,下载JSON格式的文件。

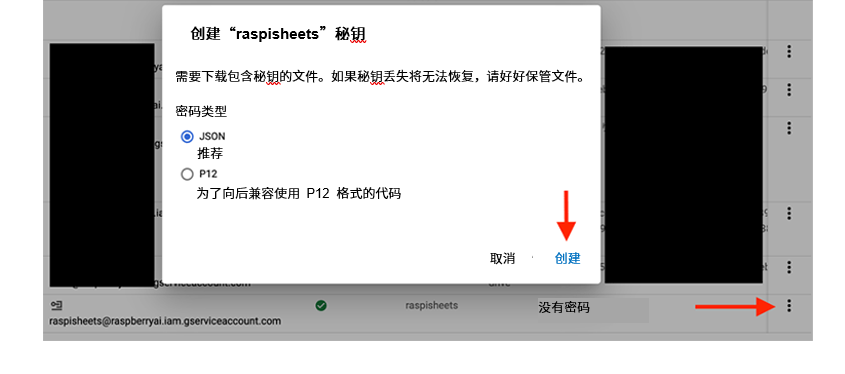
下载好JSON文件后打开,保存邮件信息“xxx@yyy.iam.gserviceaccount.com”的地址。另外,将这个JSON文件发送给Raspberry Pi。

这些设置完成后,转到 Google Sheets并尝试创建电子表格。可以访问Google Drive或使用下面的链接:
https://docs.google.com/spreadsheets/create
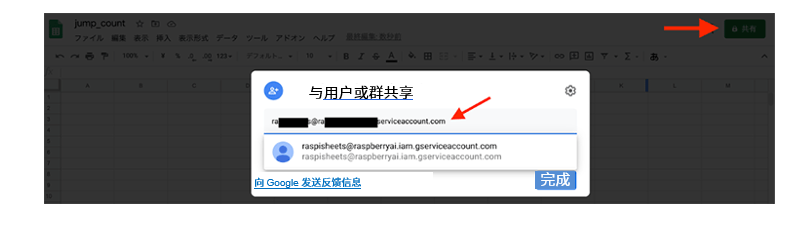
新建的Google Sheets表格打开后,在左上角的名称位置输入适当的表格名称。(我设置的是“Jump_Count”)
然后点击右侧的“分享”按钮,输入之前保存的账号信息(xxx@yyy.iam.gserviceaccount.com),完成。
2. 从Raspberry Pi上传到Google
现在,Google这边的设置已经完成,让我们从Raspberry Pi开始使用吧。启动Raspberry Pi并打开终端。
要想使用Google Sheets,需要各种认证和使用名为“gspread”的库,因此请按如下方式安装。
pi@raspizero:~/Programs $ sudo pip3 install oauth2client
pi@raspizero:~/Programs $ sudo pip3 install httplib2
Looking in indexes: https://pypi.org/simple, https://www.piwheels.org/simple
Collecting httplib2
Downloading     100% |████████████████████████████████| 102kB
Installing collected packages: httplib2

pi@raspizero:~/Programs $ sudo pip3 install gspread
现在可以将数据保存在Sheets中了。在这里,我创建了一个程序,用来从Raspberry Pi输入数据,程序如下:
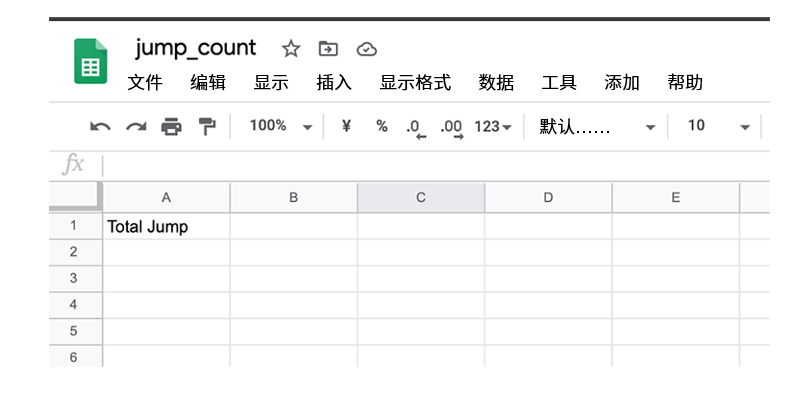
pi@raspizero:~/Programs $ sudo vi spreadsheet.py

---------

#!/usr/bin/python
# -*- coding: utf-8 -*-
import gspread
from oauth2client.service_account import ServiceAccountCredentials

key_name = ‘xxx.json’ # Use your own information
sheet_name = 'jump_count'

# Use sheets API
scope = ['https://spreadsheets.google.com/feeds','https://www.googleapis.com/auth/drive']
credentials = ServiceAccountCredentials.from_json_keyfile_name(key_name, scope)
gc = gspread.authorize(credentials)

# Enter TEST to Sell A1
cell_number = 'A1'
input_value = 'Total Jump'
wks = gc.open(sheet_name).sheet1
wks.update_acell(cell_number, input_value)
当运行这个程序时,“Jump Data”的数据会从Raspberry Pi被插入到云表格中。
3. 跳绳&保存、显示!
现在让我们修改跳绳程序,以让跳跃次数可以上传到Google。
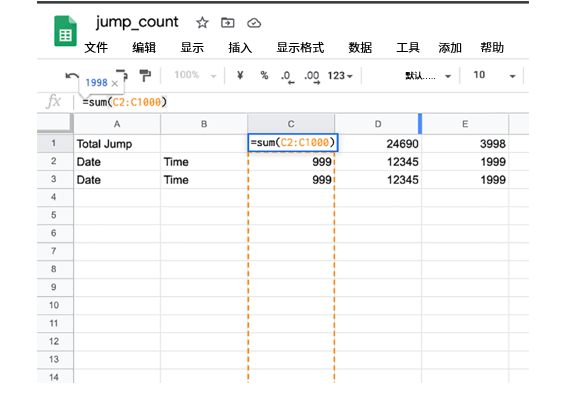
首先需要记录下您的表格的sheet_id(下面网址中红框内的部分)。

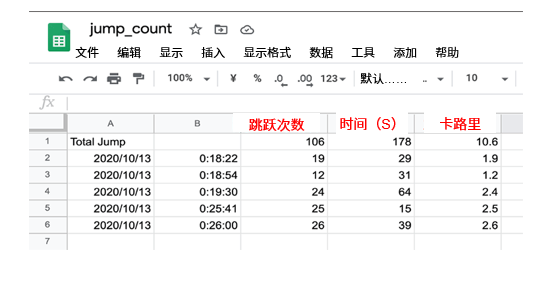
在电子表格中,日期和时间保存在A列和B列中,跳跃次数保存在C列中,跳绳时间(秒)保存在D列中,卡路里消耗量保存在E列中。当在表格的C1、D1和E1输入求和命令时,就会自动计算跳跃的总次数和消耗的卡路里总量等数据。
接下来,通过在ble_jump_4d.py程序中添加的方式,创建ble_jump_4d_sheets.py程序。为了将跳跃次数保存在Google Sheets中,需要添加以下部分:
- 第9〜42行
- 第49〜50行
- 第57〜69行
- 第76〜77行
pi@raspizero:~/Programs $ sudo cp ble_jump_4d.py ble_jump_4d_sheets.py

--- 下面的更改或添加部分用黄色表示 ---
#!/usr/bin/env python3
# coding: utf-8

---

import gspread
from apiclient import discovery
from oauth2client.service_account import ServiceAccountCredentials
import httplib2
import numpy as np
from datetime import datetime

key_name   = "xxx.json" # Use your JSON file name
sheet_name= “jump_count” # Sheet name
sheet_id      = “zzz” # Sheet Id

class SpreadSheet(object):
  def __init__(self, sheet_id):
    self.sheetId = sheet_id
    scope = ['https://spreadsheets.google.com/feeds','https://www.googleapis.com/auth/drive']
    credentials = ServiceAccountCredentials.from_json_keyfile_name(key_name, scope)
    http_auth = credentials.authorize(httplib2.Http())
    discoveryUrl = ('https://sheets.googleapis.com/$discovery/rest?''version=v4')
    self.service = discovery.build('sheets', 'v4', http=http_auth, discoveryServiceUrl=discoveryUrl)

  def append(self, values): # Append data in Google Sheets
    assert np.array(values).shape==(5,) , "The shape of value %s must be 5" % (np.array(values).shape)
    value_range_body = {'values':[values]}
    result = self.service.spreadsheets().values().append(spreadsheetId=self.sheetId,
        range=APPEND_RANGE, valueInputOption='USER_ENTERED', body=value_range_body).execute()
    print(result)

spread_sheet = SpreadSheet(sheet_id)
APPEND_RANGE = 'sheet1!A1:E1'
start_time= datetime.now()
last_time = datetime.now()
last_cnt  = 0
last_cal  = 0
last_dur  = 0

scanner = btle.Scanner()
while True:

---

    fourletterphat.print_str("JUMP")
    fourletterphat.show()

---
                SEQ = sensors['SEQ']
                jump_cnt = sensors['Steps']
                if SEQ in [255,0,1] and jump_cnt == 0:
                    start_seq+= 1
                    start_time= datetime.now()
                    print(start_time.strftime('%H:%M:%S')+" Start Jumping!")
                    if last_cnt!=0:
                        spread_sheet.append([last_time.strftime('%Y/%m/%d'), last_time.strftime('%H:%M:%S'),
                            last_cnt, last_dur, last_cal])
                else:
                    last_time= start_time
                    last_cnt = jump_cnt

                cur_time= datetime.now()
                if start_seq >= 1:
                    dur_time= cur_time - start_time
                    dur_seconds = dur_time.seconds
                    cur_cnt = jump_cnt
                    cur_cal = round(cur_cnt*0.1,1)
                    jump_text= str(cur_cnt)+" Jump "+str(cur_cal)+" Cal "+str(dur_seconds)+" s"
                    print(jump_text)
                    fourletterphat.print_number_str(cur_cnt)
                    fourletterphat.show()
                    last_dur = dur_seconds
                    last_cal = cur_cal

                '''
                for key, value in sorted(sensors.items(), key=lambda x:x[0]):
                    print('    ',key,'=',value)
                '''
让我们运行这个程序,按下SensorMedal上的按钮后跳几下吧。
在有网络的地方,每次按下按钮并跳绳,都会将次数保存下来。 我们设计的这种方式,可以成功地将跳跃次数保存在表格中。
4. 总结
在本连载中,我们使用Raspberry Pi和SensorMedal实现了连接物联网的数字化跳绳。
本文是第三部分,我们不仅实现了次数计数,而且还成功地将每次跳绳的次数等数据上传到Google Sheets以保存结果。Google Sheets很容易获得合计值和绘制图表,因此非常适合随时查看跳绳结果。
在下一部分中,也就是最后一部分,我们将使用跳跃次数和保存的数据来创建一种机制,让跳绳变得更加有趣也更加有动力,敬请期待!
第一部分:用跳绳测试仪解决运动不足问题!
第二部分:用SensorMedal检测跳跃次数并在显示器上显示
第三部分:连接Google Drive,保存并查看跳绳结果(本章)
第四部分:在设备上安装显示器以增加动力!

吉田 显一(Yoshiken)
在普通公司工作的上班族,非常喜欢创作的周末创客,出版了电子书MESHBOOK,平时也写写博客。
http://blog.ktrips.net