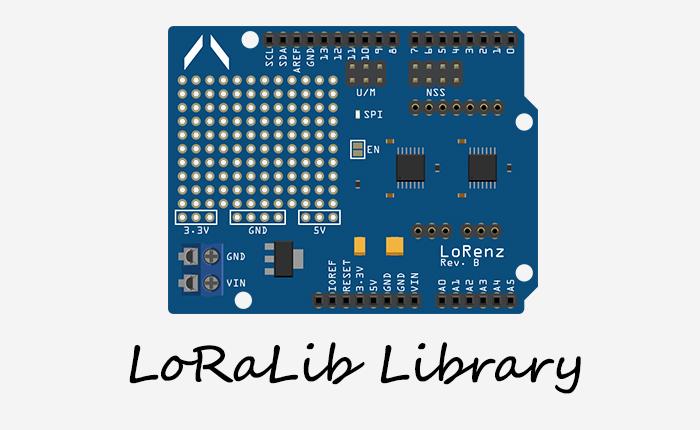
为了控制 Arduino长距离通信教程–LoRenz 开发板中构建的LoRenz开发板,我开发了LoRaLib——用于SX1278芯片的开源Arduino库。这个库从零开始设计,目的只有一个:制作易于使用的API,即使是初学者也可以实现LoRa通信。该库的目标是使远程通信与串行通信一样简单。
软件
- Arduino IDE
- LoRaLib Arduino 库 (可在 GitHub 上获得)
LoRaLib 库
SX1278有多种不同设置,允许用户完全自定义范围、数据速率和功耗,但是最重要的三个设置如下所示:
- 带宽 SX1278允许的带宽设置为7.8 kHz至500 kHz。带宽值越高,数据传输越快。然而,这是以降低总灵敏度为代价的,因此降低了最大范围。
- 扩频因子 在LoRa调制中,每个信息位由多个啁啾表示。扩频因子是指每位数据有多少啁啾。SX1278支持7种不同的设置,扩频因子越高,数据传输越慢,范围越大。
- 编码速率 为了提高传输的稳定性,SX1278可以执行错误检查功能。此错误检查的度量称为编码速率,可以设定四个值。编码速率设为最低的4/5时,传输不太稳定,速度稍快。编码速率设为最高的4/8时,链路更可靠,但代价是数据传输速率较慢。
库的默认设置为:带宽为500 kHz、编码速率为4/5和扩频因子为12。这些设置是范围、稳定性和数据速率之间的合理平衡。当然,这些设置可以通过函数随时更改。
该库内置数据包类和寻址系统。地址长度为8字节,那么最大的寻址数量就是1.8千亿亿(1.8 × 10^19)。这个数值大的离谱。相比之下,NASA估计我们银河系中的恒星数量仅为“4亿”(4×10^11)。每个数据包由源地址、目标地址和最多240字节的有效负载组成。当然,该库还提供了几种读取和写入分组数据的方法。
让我们来看一下使用这个库是多么容易。假设我们有两个带有SX1278模块的LoRenz开发板。它们相距几百米,所以我们可以使用默认设置。首先,我们必须包含库头文件。然后,我们用默认设置创建 LoRa 类的一个实例,用目标地址和消息创建 packet 类的一个实例。源地址由库自动生成并写入Arduino EEPROM。要检查所有内容是否已正确保存,我们会读取数据包信息并将其打印到串行端口。接下来,我们只需调用 tx() 函数即可。一会儿之后……完成!只需一个命令,我们的数据包就传送成功了!
// include the library
#include <LoRaLib.h>

// create instance of LoRa class with default settings
LoRa lora;

// create instance of packet class
// destination: "20:05:55:FE:E1:92:8B:95"
// data:        "Hello World !"
packet pack("20:05:55:FE:E1:92:8B:95", "Hello World!");

void setup() {
  Serial.begin(9600);

  // initialize the LoRa module with default settings
  lora.init();

  // create a string to store the packet information
  char str[24];

  // print the source of the packet
  pack.getSourceStr(str);
  Serial.println(str);

  // print the destination of the packet
  pack.getDestinationStr(str);
  Serial.println(str);

  // print the length of the packet
  Serial.println(pack.length);

  // print the data of the packet
  Serial.println(pack.data);
}

void loop() {
  Serial.print("Sending packet ");

  // start transmitting the packet
  uint8_t state = lora.tx(pack);

  if(state == 0) {
    // if the function returned 0, a packet was successfully transmitted
    Serial.println(" success!");

  } else if(state == 1) {
    // if the function returned 1, the packet was longer than 256 bytes
    Serial.println(" too long!");

  }

  // wait a second before transmitting again
  delay(1000);
}
当然,我们需要第二套配有LoRenz 开发板的Arduino来接收该数据包。 系统设置不变,只是这次我们调用 rx() 函数,然后打印接收到的数据包。此函数将等待数据包,如果数据没有在某个时间内到达,该函数将超时,以便您的代码不会完全挂起。该库甚至还会检查传输的数据包是否已损坏,如果是,则将其丢弃。
// include the library
#include <LoRaLib.h>

// create instances of LoRa and packet classes with default settings
LoRa lora;
packet pack;

void setup() {
  Serial.begin(9600);

  // initialize the LoRa module with default settings
  lora.init();
}

void loop() {
  Serial.print("Waiting for incoming transmission ... ");

  // start receiving single packet
  uint8_t state = lora.rx(pack);

  if(state == 0) {
    // if the function returned 0, a packet was successfully received
    Serial.println("success!");

    // create a string to store the packet information
    char str[24];

    // print the source of the packet
    pack.getSourceStr(str);
    Serial.println(str);

    // print the destination of the packet
    pack.getDestinationStr(str);
    Serial.println(str);

    // print the length of the packet
    Serial.println(pack.length);

    // print the data of the packet
    Serial.println(pack.data);

  } else if(state == 1) {
    // if the function returned 1, no packet was received before timeout
    Serial.println("timeout!");

  } else if(state == 2) {
    // if the function returned 2, a packet was received, but is malformed
    Serial.println("CRC error!");

  }

}
当然,这只是最基本的例子。库本身可以做更多事情,而且我还在继续开发更多的功能。有关该库和所有其他功能的更深入信息,请参阅我的 GitHub 以及那里托管的文档。
Arduino 加密
本文结束之前,我还想讨论一下Arduino的加密。我在上一篇文章中提到了这个问题。现在,我们发送的所有数据都是未加密的。这意味着拥有相同配置、使用相同模块和相同设置的任何人都能拦截和阅读我们的消息。攻击者甚至可以发送自己的消息,而我们却无法分辨。显然,这并不安全。
最简单的解决方案就是使用某种加密。具体地,我决定使用 Rijndael 密码。没听说过吧?这是因为这个名字是荷兰语,因此不好记忆和发音。密码本身实际上非常普遍,但名称更加引人注目:AES。它是一种对称密码,可在加密速度和安全性之间提供出色的平衡。此外,Arduino还提供了几个AES库!本项目使用的库是Davy Landman开发的AESLib(可从 GitHub 上获得)。
如上所述,AES是一种对称密码 – 这意味着它使用相同的密钥来加密和解密消息。现在,我们只有两个设备,因此将密钥硬编码到Arduino中非常容易。当然,如果我们想要动态添加更多设备并创建某种无线网络,我们必须以某种方式实现安全密钥交换,例如使用Diffie-Hellman交换。但是我们现在不会深入这个领域,我们只需将密钥硬编码到我们的Arduino程序中即可。
那么我们应该如何修改上一章的代码呢?修改并不多,说实话,我们只需添加密钥以及一个加密或解密数据包中的数据。这是发射机部分,加密通过 aes128_enc_single() 函数完成。
// include the libraries
#include <LoRaLib.h>
#include <AESLib.h>

// create instance of LoRa class with default settings
LoRa lora;

// create instance of packet class
// destination: "20:05:55:FE:E1:92:8B:95"
// data:        "Hello World !"
packet pack("20:05:55:FE:E1:92:8B:95", "Hello World!   ");

// our secret 16-byte long key
uint8_t key[] = {0x2C, 0x66, 0x54, 0x94, 0xE3, 0xAE, 0xC7, 0x32,
                 0xC4, 0x66, 0xC8, 0xBE, 0xF3, 0x71, 0x22, 0x36};

void setup() {
  Serial.begin(9600);

  // initialize the LoRa module with default settings
  lora.init();

  // create strings to store the packet information
  char src[24];
  char dest[24];

  // print the source of the packet
  pack.getSourceStr(src);
  Serial.print("Source:\t\t\t");
  Serial.println(src);

  // print the destination of the packet
  pack.getDestinationStr(dest);
  Serial.print("Destination:\t\t");
  Serial.println(dest);

  // print the length of the packet
  Serial.print("Total # of bytes:\t");
  Serial.println(pack.length);

  // print the contents of unencrypted packet
  Serial.println("-------- Plain text ---------");
  Serial.println(pack.data);

  // encrypt the data
  aes128_enc_single(key, pack.data);

  // print the contents of encrypted packet
  Serial.println("--- Encrypted with AES128 ---");
  Serial.println(pack.data);
}

void loop() {
  Serial.print("Sending packet ");

  // start transmitting the packet
  uint8_t state = lora.tx(pack);

  if(state == 0) {
    // if the function returned 0, a packet was successfully transmitted
    Serial.println(" success!");

  } else if(state == 1) {
    // if the function returned 1, the packet was longer than 256 bytes
    Serial.println(" too long!");

  }

  // wait a second before transmitting again
  delay(1000);
}
接收机部分如下所示,解密通过相同密钥和函数 aes128_dec_single() 完成。
// include the libraries
#include <LoRaLib.h>
#include <AESLib.h>

// create instances of LoRa and packet classes with default settings
LoRa lora;
packet pack;

// our secret 16-byte long key
uint8_t key[] = {0x2C, 0x66, 0x54, 0x94, 0xE3, 0xAE, 0xC7, 0x32,
                 0xC4, 0x66, 0xC8, 0xBE, 0xF3, 0x71, 0x22, 0x36};

void setup() {
  Serial.begin(9600);

  // initialize the LoRa module with default settings
  lora.init();
}

void loop() {
  Serial.print("Waiting for incoming transmission ... ");

  // start receiving single packet
  uint8_t state = lora.rx(pack);

  if(state == 0) {
    // if the function returned 0, a packet was successfully received
    Serial.println("success!");

    // create strings to store the packet information
    char src[24];
    char dest[24];

    // print the source of the packet
    pack.getSourceStr(src);
    Serial.print("Source:\t\t\t");
    Serial.println(src);

    // print the destination of the packet
    pack.getDestinationStr(dest);
    Serial.print("Destination:\t\t");
    Serial.println(dest);

    // print the length of the packet
    Serial.print("Total # of bytes:\t");
    Serial.println(pack.length);

    // print the contents of encrypted packet
    Serial.print("Encrypted (AES128):\t");
    Serial.println(pack.data);

    // decrypt the data
    aes128_dec_single(key, pack.data);

    // print the contents of unencrypted packet
    Serial.print("Plain text:\t\t");
    Serial.println(pack.data);

  } else if(state == 1) {
    // if the function returned 1, no packet was received before timeout
    Serial.println("timeout!");

  } else if(state == 2) {
    // if the function returned 2, a packet was received, but is malformed
    Serial.println("CRC error!");

  }

}
使用了密钥之后,我们的消息现在是安全的。如果有人偷听我们的谈话,他无法看到除地址之外的任何内容,每个数据包中都是240字节的乱码。同样,如果攻击者试图传输他自己的消息,我们会立即知道,因为他传输的消息不会加密。
在Arduino上用AES加密非常简单,所以我推荐使用该加密方法。这不仅仅是一个很好的编程实践。您永远不知道谁以及为什么可能会偷听您看似无辜的对话。
结论
现在,Arduino远程无线通信的短暂旅途就要结束了。如果您开发自己的LoRenz开发板并将其应用于一些很酷的Arduino项目,请告诉我!如果您有改进LoRenz开发板和LoRaLib库的想法,请在GitHub上与我分享。
我对开发板进行了测试,当带宽为500kHz、扩展因子为12、编码率为4/8时,在无障碍环境中我能够实现超过500米的可靠传输;在茂密的森林中传输距离则超过200米。所有这一切都只是通过一根10cm天线实现的,而且发射器电源也只是廉价的9V电池而已(接收器从USB端口接电,最终通过Arduino板载稳压器供电)。这个距离还可以更长(通过降低带宽),但是这会导致传输速度显著降低,在上述设置不变的情况下传输速度大约为1 kbps。
然而,对于我将来的项目,这些距离绰绰有余。请在社交媒体上关注DevicePlus,这样您就不会错过任何有趣的内容!

