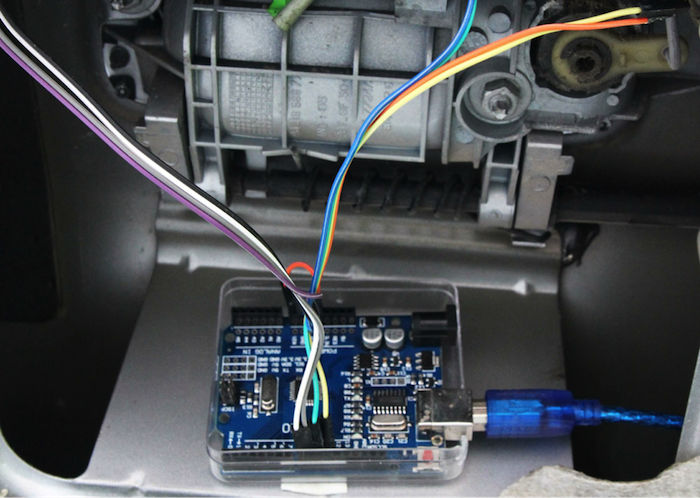
在本教程中,将对低成本简易驻车辅助传感器的安装和使用进行说明。当驾驶员停车入位时,本装置使用两只HC-SR04超声波传感器和四只压电蜂鸣器多次提醒驾驶员本车后面及周围汽车的接近情况,同时并发出哔哔声警报。我们还将解决其他问题,如汽车驾驶室内的防水和电线铺设等。
硬件
- Arduino UNO (1x)
- HC-SR04 超声波传感器 (2x)
- Vcc 线 (长约 2m)
- 地线 (长约 2m)
- 触发线 (长约 1m)
- 回声线 (长约 1m)
- 压电式蜂鸣器 (2x)
- USB 车载适配器
- Aduino 塑胶外壳/外盒
软件
- Arduino IDE
- Github
工具
- 钳子
第1步:设置系统
首先请准备好下文所述电子设备,以便在车内实际安装汽车传感器前能对系统进行测试。
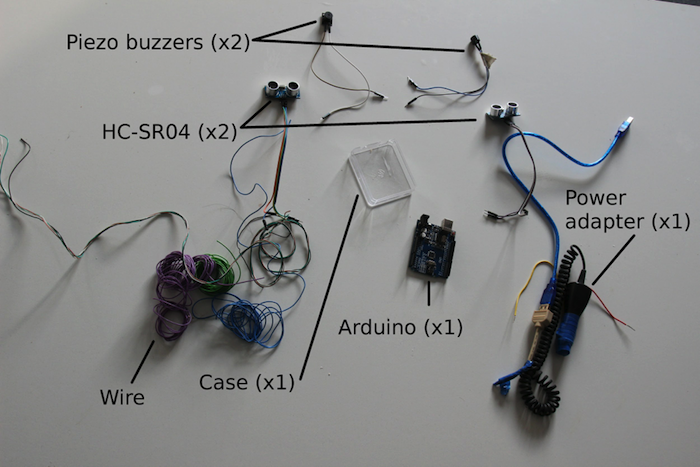
图1:需准备好的硬件 — Arduino、塑胶外壳、超声波传感器、压电式蜂鸣器、电线和电源适配器
在本项目中,我们仅在车辆后部使用两只传感器:一只位于保险杠的左侧,另一只位于保险杠的右侧。大多数新车的辅助警报系统最多可配备六只传感器,从而可实现更精确的定位。
HC-SR04 传感器带有以下四根引脚:
- VCC (电源5V)
- 触发器
- 信号回路
- 接地
上述模块功能的更详细说明,可参见上一教程:带部件和传感器的Arduino — 超声波传感器的用法
在下图2中列出了将汽车传感器和蜂鸣器连接到Arduino的图表。
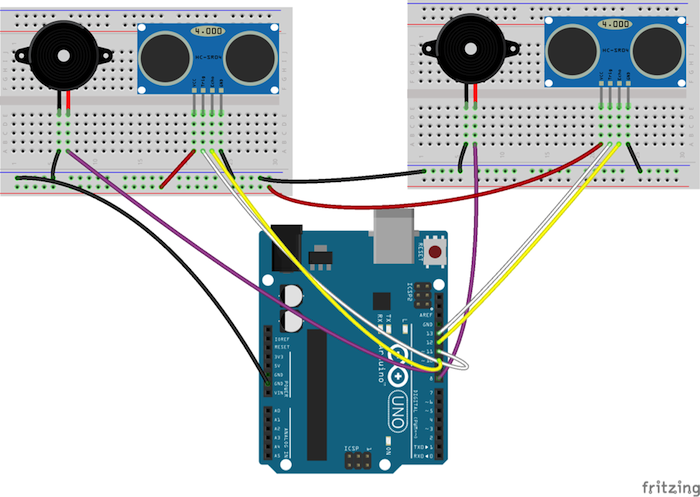
图2:Arduino、超声波传感器和压电蜂鸣器的接线图
第2步:对Arduino编程
以下为编写一个程序的基本指南。一般而言,任何微控制器固件都包括以下四个基本元素:
- 整体思路理念和数据库的定义
- 设置功能
- 回路功能
- 其他功能
与软件开发不同,对微控制器进行编程时,通常对代码的大小进行适当限制。My Arduino Uno软件配有一个内存为32 KB的Atmega328。该配置足以满足本次应用的需要。
#define trigPin1 13
#define echoPin1 12
#define buzzerPin1 6
#define trigPin2 11
#define echoPin2 10
#define buzzerPin2 7
void setup() {
  Serial.begin (9600);
  pinMode(trigPin1, OUTPUT);
  pinMode(echoPin1, INPUT);
  pinMode(buzzerPin1, OUTPUT);
  pinMode(trigPin2, OUTPUT);
  pinMode(echoPin2, INPUT);
  pinMode(buzzerPin2, OUTPUT);
  pinMode(2, OUTPUT);         // We will use the pin 2 as ground. We need to make sure it
  digitalWrite(2,LOW);             // is in LOW position so it works as a ground.
}
通过函数pinMode()和digitalWrite()可对微控制器引脚进行简易外围配置。本次应用中使用pinMode()函数来设置指定引脚的电流流向。可用作电流或信号的输入或输出。设置流向后,引脚仅可按该流向工作。可使用digitalWrite()函数将指定的数字引脚设置为HIGH(高)或LOW(低)。本例中将引脚2设置为另一个新增接地,用来连接其中一个器件的GND引脚。
void loop() {
  calculateDistance(echoPin1, trigPin1,buzzerPin1);  //Get the distance for the left
  calculateDistance(echoPin2, trigPin2,buzzerPin2);  //Get the distance for the right
}
为简单起见,特定义了一个函数(calculateDistance(信号回路、触发器、蜂鸣器),该函数在其中一只传感器中优先使用,同时也可在另一只传感器中使用。
//**********************************************************************************
//***Function to measure time of return of an ultrasound echo.************
//***Set up for distances shorter than 2 m, which is enough for parking**
//***Beyond that HC-SR04 is not reliable ***********************************
//**********************************************************************************
void calculateDistance(int echo, int trigger, int buzzer){
  long duration, distance;

  digitalWrite(trigger, LOW);              // Set the trigger pin of the HC-SR04 to LOW
  delayMicroseconds(2);                   // Wait a little to stabilize the sensor
  digitalWrite(trigger, HIGH);             // Set the trigger HIGH and send a pulse

  delayMicroseconds(10);                 // Wait for 10us until the wave comes back
  digitalWrite(trigger, LOW);              // Set the trigger pin of the HC-SR04 to LOW again

  duration = pulseIn(echo, HIGH);   // Arduino’s built in function pulseIn reads a pulse
            // (either HIGH or LOW) on a pin. Returns the length of
 // the pulse in microseconds or 0 if no complete pulse
 // was received within the timeout.

  distance = (duration/2) / 29.1;       // The speed of sound is 340 m/s or 29 microseconds
// per centimeter.
// The ping travels out and back, so to find the distance
// if the object we take half of the distance travelled.

  if (distance >= 200 || distance <= 0){
Serial.println("Out of range");     // Use some feedback in the serial port for
        // debugging
  }
  else {
	tone(buzzer,2000,25);         	// Arduino’s built in function tone generates a square
           	// wave of the specified frequency (2000Hz) for the
           	// indication time (25 ms)
	delay(distance*10);		// The delay gives feedback beeping faster the closer
					// we get to an object
	Serial.print(distance);	// Use some feedback in the serial port for
// debugging
	Serial.println(" cm");
  }
}
应用时首先激活一根引脚(触发器),经过一段时间后从另一个引脚(信号反馈)传回的反馈信息才能到达该引脚。针对这一时段,可以进行一些假设并计算信号反馈回路的相应距离(例如声速为340米/秒或29微秒/厘米)。可将该距离用作一个参数,用来确定蜂鸣器所发出的2000赫兹的嘟嘟声的频率(我通过反复试验才构想出这一方法,您可随意将其改为您喜欢的音调)。
同时使用了几个内置函数,如tone (引脚, 频率, 持续时间), digitalWrite (引脚), delayMicroseconds(持续时间), 和 pulseIn(引脚, 脉冲峰值).
第3步:制定适当的装配方案
找到汽车后部的防水区域。将传感器安装于该区域。在试验车里有几个可选位置:
- 尾灯罩
- 靠近汽车牌照灯
- 后保险杠上
若将汽车传感器放置于尾灯罩或后保险杠内,则必须钻孔以便超声波发射和接收。但钻孔也可能带来不利影响,如进水(淋雨、溅水等),因此钻孔必须十分考究。由于超声波无法透过密封剂,因此用密封剂作为防水材料不可取。而且很难根据传感器来确定孔的位置,从而难以避免衍射效应。
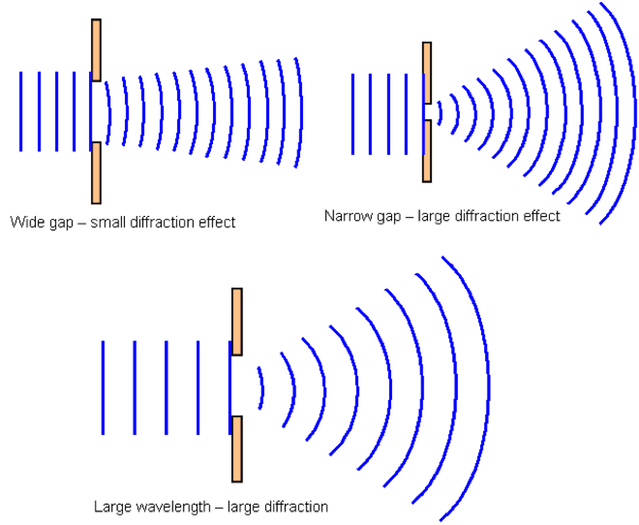
图3:配置超声波传感器时带来的衍射问题 /©bta304
欲了解衍射波的更多信息,请单击此处。
基于上述原因,特将汽车传感器置于车牌附近,该区域中后备箱门/把手下方的间隙足够大,从而避免了钻孔的麻烦。在该位置仅需稍微调整传感器的方向,使之对准汽车的一角即可。
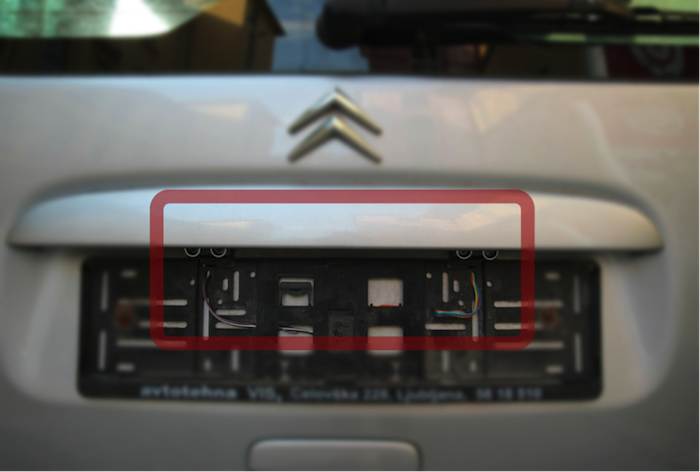
图4:找到传感器的合适位置
第4步:在车内配置硬件
找到Arduino和Piezo蜂鸣器所在位置。在该步骤中,需拆下车门并找到一个安全的空位,用来连接电子设备。
以下步骤十分有趣!通过车内面板就能看出您汽车的全新尺寸。车内空间很大,还可以加装很多设备(也可用于将来装修!)。还有许多内部电线为车辆安全元件供电。切勿触摸任何重要的电线。
您必须非常小心车内零件。
通过车牌固定孔将汽车外部的超声波传感器连接到Arduino上。这些固定孔必须做得够大,以确保所有八根电线都能顺利穿过,并预留支撑螺钉的空间。
Piezo蜂鸣器采用简单的双面胶带固定。
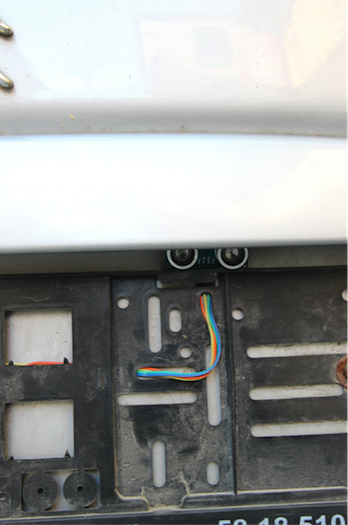
图5:在牌照右侧装配HC-SR04
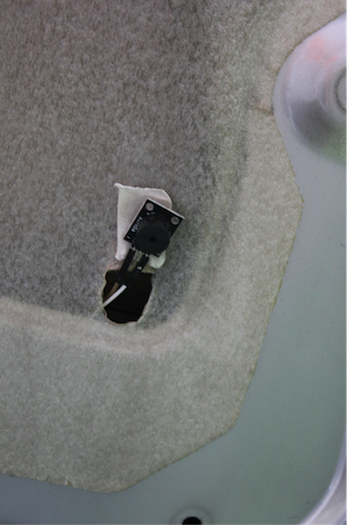
图6:使用双面胶带固定其中一个Piezo蜂鸣器
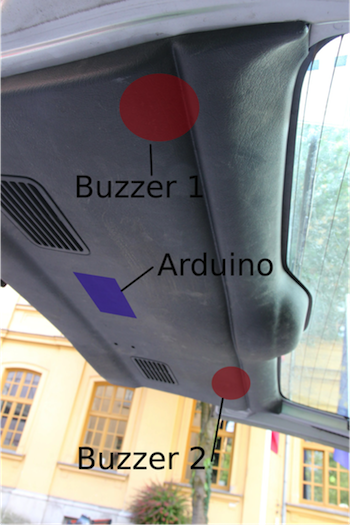
图7:模块在行李箱门上所在的位置(车内视图)
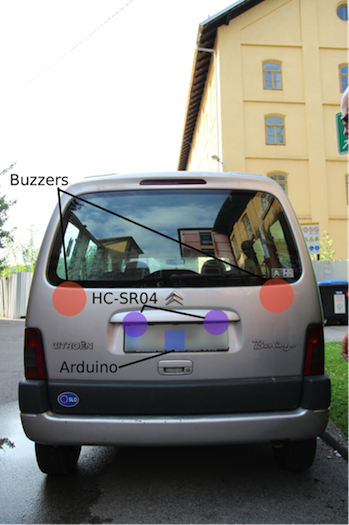
图8:模块的位置(后视图)
<


