第1回:用Raspberry Pi和传感器制作“可自动营造舒适空间的装置” 第一部分
第2回:用Raspberry Pi和传感器制作“可自动营造舒适空间的装置” 第二部分
第3回:用Raspberry Pi和传感器制作“可自动营造舒适空间的装置” 第三部分
大家好,我是吉田!
创作一款让家中更舒适、让在家办公更高效的设备,这个项目终于迎来了剧终篇。这次我们将会再增加一些功能,以完成这个项目。我们会添加一个根据天气预报信息和天气情况提示主人行动的功能,最终创作完成这个可以营造舒适环境的设备,让您即使在家办公也可以舒适地工作!
本部分所需部件
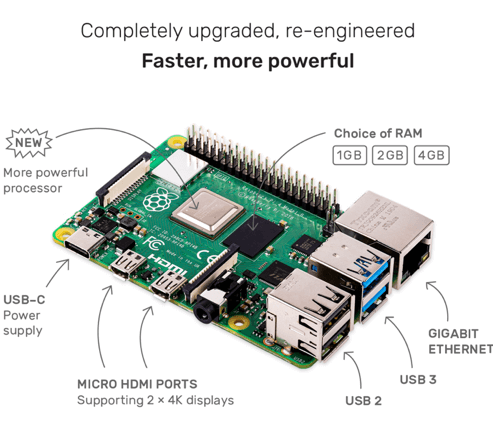
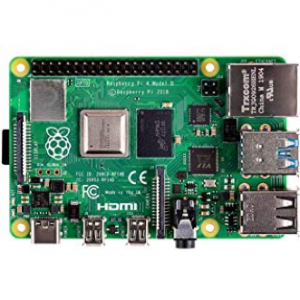
Raspberry Pi 3 B+ 或 Raspberry Pi 4 Model B
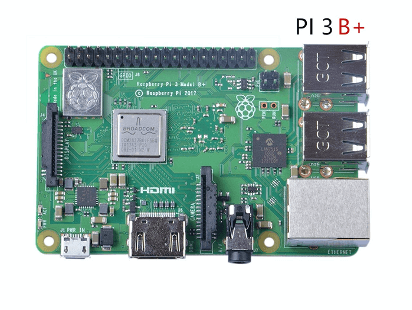
Raspberry Pi 3 B+
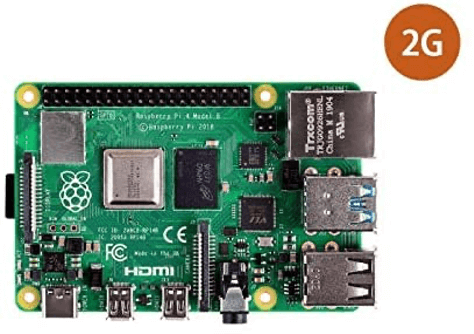
Raspberry Pi 4 Model B
Raspberry Pi用液晶显示器 或 触控显示器
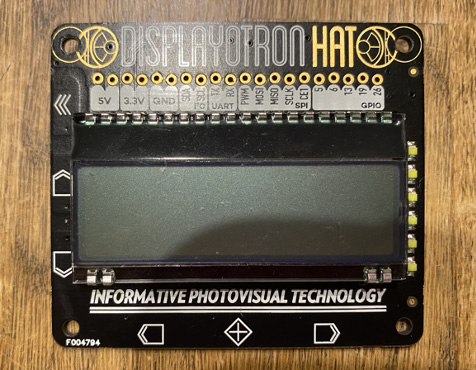
Raspberry Pi用液晶显示器

触控显示器
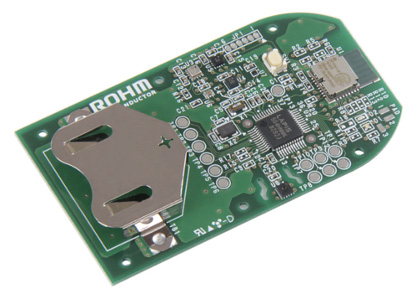
罗姆SensorMedal(SensorMedal-EVK-002)
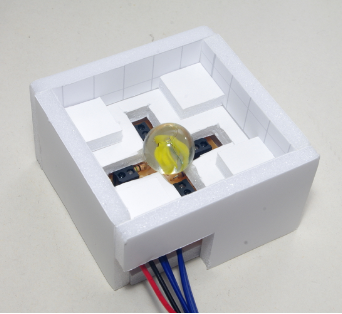
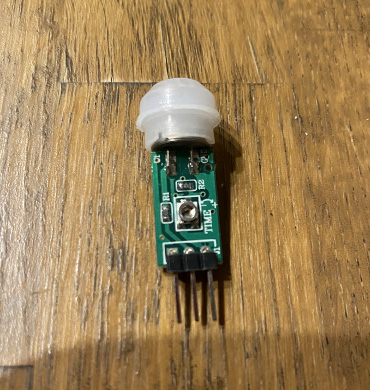
热释电红外线传感器 (SB412A)
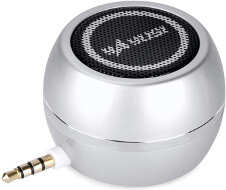
小型扬声器
手机电池

USB设备

本部分的流程
- 根据传感器的值控制硬件
- 关联天气信息和互联网信息
- 完成这款可以营造舒适环境的装置
- 总结
1. 根据传感器的值控制硬件
在第二部分中,我们使用SensorMedal测量了温度和湿度;在第三部分中,我们添加了人体传感器。最初,我们也是打算利用传感器的值来实现下面这些功能的,所以让我们来把它们变为现实吧。
| 编号 | 检测功能 | 检测后希望具备的功能 |
| 1 | 检测房间的温度 | 根据室温控制风扇等 |
| 2 | 检测房间的舒适度(例如湿度) | 如果湿度高,将空调设置为除湿模式 |
| 5 | 检测坐在椅子上的时间 | 检测到坐的时间太久(久坐不动),督促主人站起来活动活动 |
首先是检测完温度后,如果室温高于一定水平,需要自动打开风扇保持凉爽。在Raspberry Pi上插入USB迷你风扇。
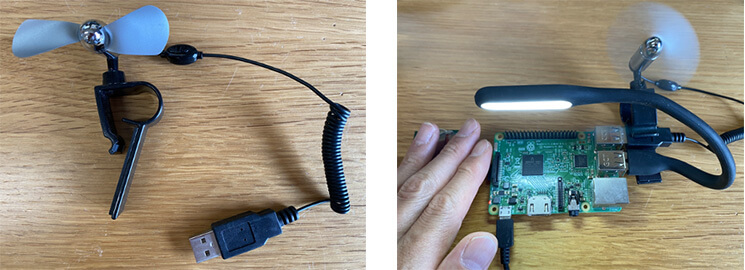
要想让风扇根据室温情况打开或关闭,需要使用第二部分中用过的hub-ctrl命令来控制Raspberry Pi的USB功能。例如,当室温超过26℃时,给USB通电让风扇转起来。
另外,当使用人体传感器测得您在工作台周围停留超过某一时长(久坐)时,让Raspberry Pi发出声音来提醒您可能会很有趣。下面,我们将迷你扬声器插入Raspberry Pi。
获取名为“AquesTalkPi”的可以朗读的语音合成软件,在Programs下解压。
$ cd ~/Programs
$ wget http://www.a-quest.com/download/package/aquestalkpi-20130827.tgz
$ sudo tar zxvf aquestalkpi-20130827.tgz
$ cd aquestalkpi
然后,我们尝试让它播放“该休息了”之类的声音。
$ ./AquesTalkPi "休憩しましょう!" | aplay
要实现这些功能,需要在第三部分中使用过的ble_lcd.py程序中,添加下面的第2行、第29〜36行(温湿度控制)和第4〜6行、第12〜17行、第38〜43行(人体传感器控制)的内容。
[ble_lcd.py]
…
import os

human_count = 0
human_check = 30
aquest_path = "/home/pi/Programs/aquestalkpi/"

scanner = btle.Scanner()
while True:
…

    human = GPIO.input(human_pin)
    if human == 1:
      human_count+=1
    else:
      human_count=0
    print('HCount:'+str(human_count))

    ...

    # 针对接收到的数据,对每一个BLE设备进行处理
    for dev in devices:
    ...
                '''
                for key, value in sorted(sensors.items(), key=lambda x:x[0]):
                    print('    ',key,'=',value)
                '''

                temp  = sensors['Temperature']
                humid = sensors['Humidity']
                if temp > 26 or humid > 60:
                    temp_msg = "Hot!"
                    os.system("sudo hub-ctrl -b 1 -d 2 -P 2 -p 1")
                else:
                    temp_msg = "Not bad"
                    os.system("sudo hub-ctrl -b 1 -d 2 -P 2 -p 0")

                human_msg = str(human_count)
                if human_count > human_check:
                    human_msg += ' Take Rest!'
                    os.system(aquest_path+'AquesTalkPi "休憩しましょう!" | aplay')
                else:
                    human_msg += ' Work Hard!'
2. 关联天气信息和互联网信息
最后,我们可以从网上获取天气预报等信息,这样会很方便。如果要下雨,最好让它大声朗读并提醒主人采取必要的行动。
| 编号 | 检测功能 | 检测后希望具备的功能 |
| 6 | 确认天气 | 如果天气预报有雨,提醒主人将晒在外面的衣物收回来 |
首先,我们需要使用名为“OpenWeatherMap”的服务来获取天气预报。如下图所示,该网站是英文的,但是从上面可以轻松获取日本国内天气,所以我们将使用这里提供的API。
https://openweathermap.org/api
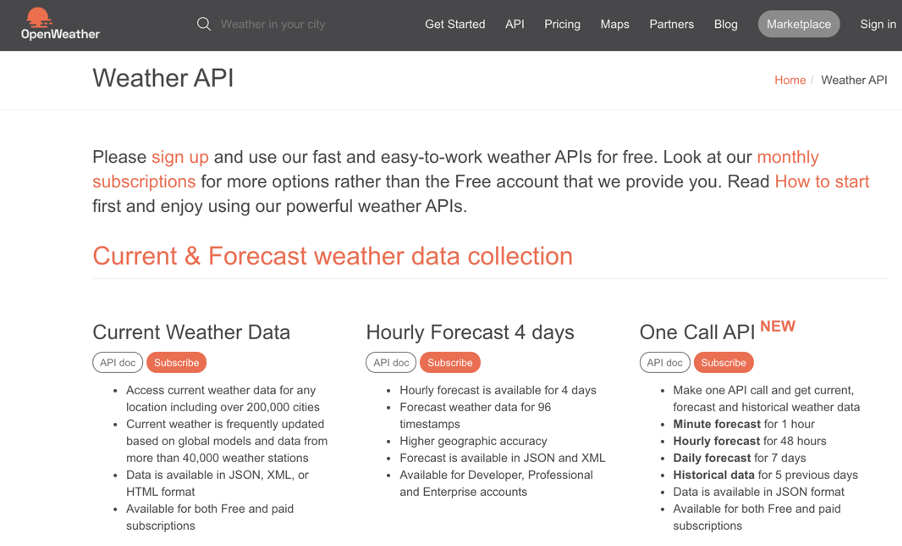
从该页面的右上方创建一个帐户并登录。
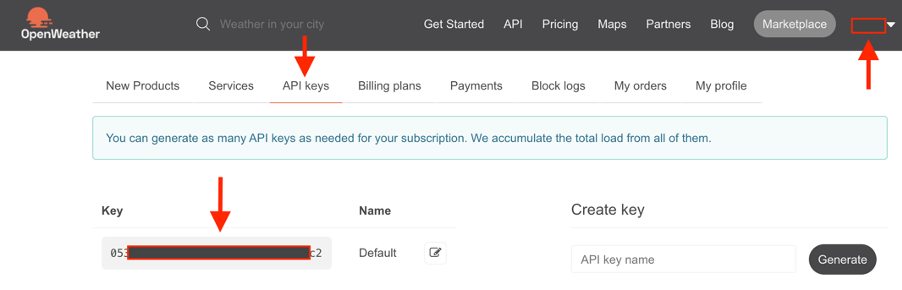
然后进入称为“API Keys”的页面,确认Key(秘钥)并复制此密钥。
接下来,我们需要创建一个可以获取天气预报的程序。首先,要安装以下库文件。
$ sudo pip3 install pytz requests
创建一个名为“forecast.py”的示例程序。将刚刚复制的密钥输入API_KEY部分。另外,需要在ZIP部分输入您的邮政编码,并添加国家代码“JP”。下面,我们让刚刚的Aquestalk软件也能够播报天气吧。
[forecast.py]
#! /usr/bin/python3
# -*- coding: utf-8 -*-
import json
import datetime
import os
import requests
import sys

from pytz import timezone

API_KEY = "XXX"
ZIP = "123-4567,JP"
API_URL = "http://api.openweathermap.org/data/2.5/forecast?zip={0}&units=metric&lang=ja&APPID={1}"

def getWeatherForecast():
    url = API_URL.format(ZIP, API_KEY)
    response = requests.get(url)
    forecastData = json.loads(response.text)

    if not ('list' in forecastData):
            print('error')
            return

    for item in forecastData['list']:
        forecastDatetime = timezone(
            'Asia/Tokyo').localize(datetime.datetime.fromtimestamp(item['dt']))
        weatherDescription = item['weather'][0]['description']
        temperature = item['main']['temp']
        rainfall = 0
        if 'rain' in item and '3h' in item['rain']:
            rainfall = item['rain']['3h']
        break

    print('Date:{0} Weather:{1} Temp:{2} C Rain:{3}mm'.format(
        forecastDatetime, weatherDescription, temperature, rainfall))
 return forecastDatetime, weatherDescription, temperature, rainfall

forecastDatetime, weatherDescription, temperature, rainfall = getWeatherForecast()

os.system(“/home/pi/aquestalkpi/AquesTalkPi “ + weatherDescription + “ | aplay”)
如下所示,运行该程序时,将会返回指定地区的天气预报。于是,Raspberry Pi就会向您播报今天的天气预报了,比如“多云”。
$ python3 forecast.py
Date:2020-06-05 00:00:00+09:00 Weather:多云 Temp:23.29 C Rain:0mm
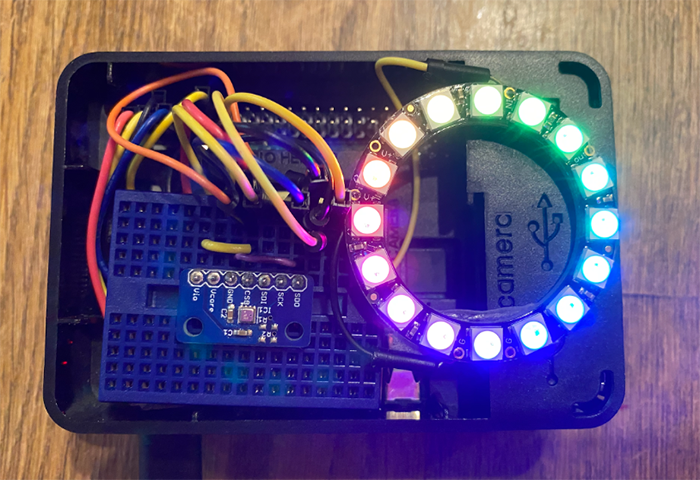
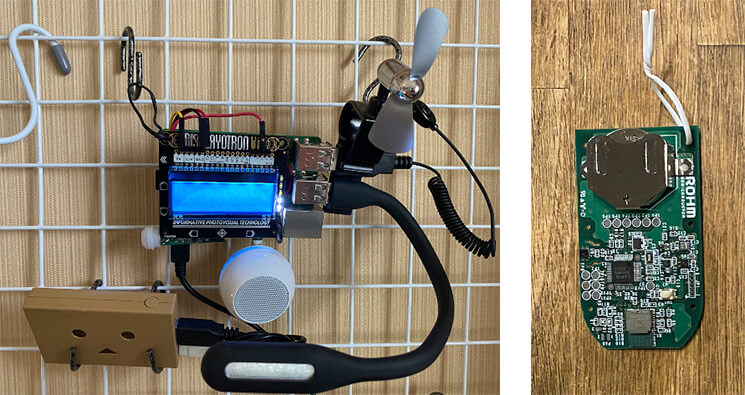
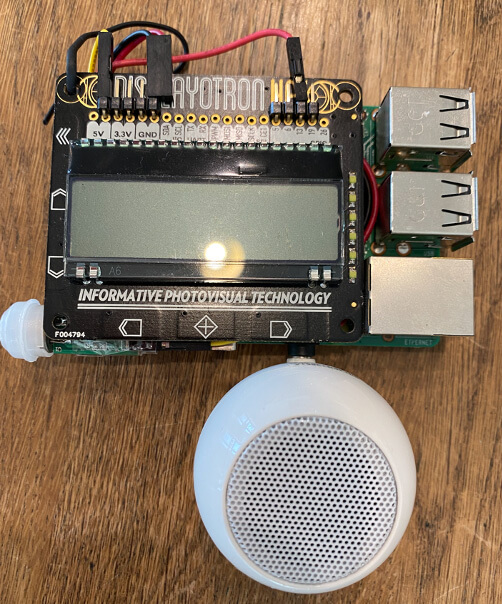
3. 完成这款可以营造舒适环境的装置
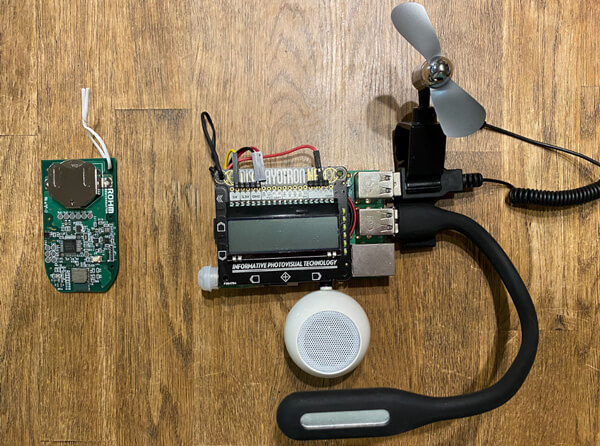
下面,我们将液晶显示器、扬声器、人体传感器和USB设备都连接到Raspberry Pi,以完成该设备。
SensorMedal可以放置在BLE范围内的任何位置,因此可以将其放置在您桌子周围或窗户附近。当然,您也可以将它放在电脑附近或挂在墙上。
下面是该设备的最终程序,可以让设备根据SensorMedal、人体传感器和天气预报等信息执行任务。程序仅供参考。
[ble_lcd.py]
#!/usr/bin/env python3
# coding: utf-8

import dothat
import dothat.backlight as backlight
import dothat.lcd as lcd

interval = 10 # 動作間隔

from datetime import datetime
from bluepy import btle
from sys import argv
import getpass
from time import sleep

import os
import RPi.GPIO as GPIO
human_pin = 13
GPIO.setmode(GPIO.BCM)
GPIO.setup(human_pin, GPIO.IN)
human_count = 0
human_check = 3

import json
import requests
import sys
from pytz import timezone

API_KEY = "xxx" #WeatherMap API Key
ZIP = "123-4567,JP" #Your address
API_URL = "http://api.openweathermap.org/data/2.5/forecast?zip={0}&units=metric&lang=ja&APPID={1}"
aquest_path = "/home/pi/Programs/aquestalkpi/" #AquesTalkPi path

def getWeatherForecast():
    url = API_URL.format(ZIP, API_KEY)
    response = requests.get(url)
    forecastData = json.loads(response.text)
    if not ('list' in forecastData):
            print('error')
            return
    #print(forecastData)
    for item in forecastData['list']:
        forecastDatetime = timezone('Asia/Tokyo').localize(datetime.fromtimestamp(item['dt']))
        weatherDescription = item['weather'][0]['description']
        temperature = item['main']['temp']
        rainfall = 0
        if 'rain' in item and '3h' in item['rain']:
            rainfall = item['rain']['3h']
        break
    print('Date:{0} Weather:{1} Temp:{2} C Rain:{3}mm'.format(forecastDatetime, weatherDescription, temperature, rainfall))
    return forecastDatetime, weatherDescription, temperature, rainfall

def payval(num, bytes=1, sign=False):
    global val
    a = 0
    for i in range(0, bytes):
        a += (256 ** i) * int(val[(num - 2 + i) * 2 : (num - 1 + i) * 2],16)
    if sign:
        if a >= 2 ** (bytes * 8 - 1):
            a -= 2 ** (bytes * 8)
    return a

scanner = btle.Scanner()
while True:
    now = datetime.now()
    d = '{0:0>4d}/{1:0>2d}/{2:0>2d}({3})'.format(now.year, now.month, now.day, now.strftime('%a'))
    t = '{0:0>2d}:{1:0>2d}:{2:0>2d}'.format(now.hour, now.minute, now.second)
    forecastDatetime, weatherDescription, temperature, rainfall = getWeatherForecast()

    lcd.clear()
    lcd.set_cursor_position(0, 0)
    lcd.write('{}'.format(d))
    lcd.set_cursor_position(2, 1)
    lcd.write('{}'.format(t))
    lcd.set_cursor_position(0, 2)
    lcd.write('W:{0}C {1}mm'.format(round(temperature,0), rainfall))
    if rainfall > 0:
          print(weatherDescription, rainfall)
          os.system(aquest_path+'AquesTalkPi '+weatherDescription+' | aplay')

    human = GPIO.input(human_pin)
    if human == 1:
      human_count+=1
    else:
      human_count=0
    print('HCount:'+str(human_count))

    try:
        devices = scanner.scan(interval)
    except Exception as e:
        print("ERROR",e)
        if getpass.getuser() != 'root':
            print('使用方法: sudo', argv[0])
            exit()
        sleep(interval)
        continue

    # 受信データについてBLEデバイス毎の処理
    for dev in devices:
        print("\nDevice %s (%s), RSSI=%d dB" % (dev.addr, dev.addrType, dev.rssi))
        isRohmMedal = False
        sensors = dict()
        for (adtype, desc, val) in dev.getScanData():
            print("  %s = %s" % (desc, val))
            if desc == 'Short Local Name' and val[0:10] == 'ROHMMedal2':
                isRohmMedal = True
            if isRohmMedal and desc == 'Manufacturer':
                # センサ値を辞書型変数sensorsへ代入
                sensors['ID'] = hex(payval(2,2))
                sensors['Temperature'] = -45 + 175 * payval(4,2) / 65536
                sensors['Humidity'] = 100 * payval(6,2) / 65536
                sensors['Pressure'] = payval(22,3) / 2048
                sensors['Illuminance'] = payval(25,2) / 1.2
                sensors['Battery Level'] = payval(30)
                sensors['RSSI'] = dev.rssi

                # 画面へ表示
                print('    ID            =',sensors['ID'])
                print('    Temperature   =',round(sensors['Temperature'],2),'℃')
                print('    Humidity      =',round(sensors['Humidity'],2),'%')
                print('    Pressure      =',round(sensors['Pressure'],3),'hPa')
                print('    Illuminance   =',round(sensors['Illuminance'],1),'lx')
                print('    Battery Level =',sensors['Battery Level'],'%')
                print('    RSSI          =',sensors['RSSI'],'dB')

                '''
                for key, value in sorted(sensors.items(), key=lambda x:x[0]):
                    print('    ',key,'=',value)
                '''

                temp  = sensors['Temperature']
                humid = sensors['Humidity']
                lcd.clear()
                dothat.backlight.set_graph(0.5) # 50%
                backlight.rgb(0, 0, 0)
                if temp > 28 or humid > 80:
                    temp_msg = "Hot!"
                    backlight.rgb(255, 0, 0) #Red
                else:
                    temp_msg = "Not bad"

                illum = sensors['Illuminance']
                if illum < 200:
                    illum_msg = "Dark!"
                    os.system("sudo hub-ctrl -b 1 -d 2 -P 2 -p 1")
                    backlight.rgb(255, 255, 255)
                else:
                    illum_msg = "Bright"
                    os.system("sudo hub-ctrl -b 1 -d 2 -P 2 -p 0")
                    backlight.rgb(0, 0, 255) #Blue

                human_msg = str(human_count)
                dothat.backlight.off()
                for led in range(human_count):
                    backlight.graph_set_led_state(led, 0.2)
                if human_count > human_check:
                    human_msg += ' Take Rest!'
                    backlight.rgb(0, 255, 0) #Green
                    os.system(aquest_path+'AquesTalkPi "休憩しましょう!" | aplay')
                else:
                    human_msg += ' Work Hard!'
                    backlight.rgb(0, 255, 255) #Lightblue

                lcd.clear()
                lcd.set_cursor_position(0, 0)
                lcd.write('T:{0:1.0f}C {1:1.0f}% {2}'.format(temp,humid,temp_msg))
                lcd.set_cursor_position(0, 1)
                lcd.write('I:{0:1.0f} Lx {1}'.format(illum,illum_msg))
                lcd.set_cursor_position(0, 2)
                lcd.write('H:{}'.format(human_msg))
                sleep(interval)
最后,我们让这个程序能够自动启动吧。首先,创建一个shell程序来运行Python程序。需要进行服务设置,以使启动该shell程序时能够执行Python程序。
[blelcd.sh]
#!/bin/sh
sudo /usr/bin/python3 /home/pi/Programs/ble_lcd.py
[blelcd.service]
Description=ROHM MEDAL BLE to LCD

[Service]
ExecStart=/bin/bash /home/pi/Programs/blelcd.sh
WorkingDirectory=/home/pi/Programs
User=pi

[Install]
WantedBy=multi-user.target
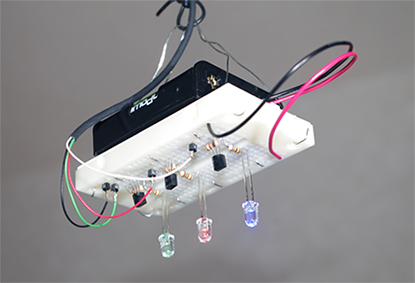
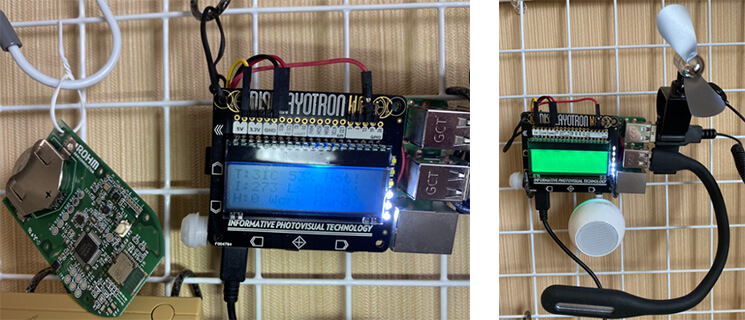
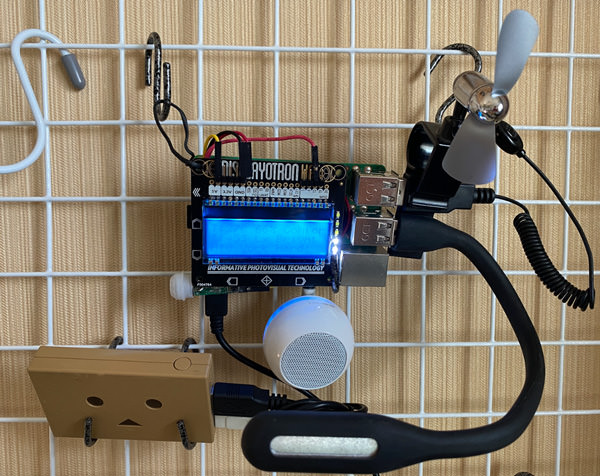
现在,当您重新启动它时,Raspberry Pi将会显示传感器的值,指示灯开始闪烁。
4. 总结
在这个连载系列中,我们针对在家办公时间增加的情况,创作了一个可以检测办公环境并改善环境的设备。
在第一部分中,我们思考并列举了希望实现的目标,也了解了用罗姆的SensorMedal可以测得多种值。
在第二部分中,我们创建了实际通过Raspberry Pi和BLE连接SensorMedal用的程序。
在第三部分中,我们使用人体传感器,实现了检测是否有人(是否久坐不动)的功能。此外,还用液晶显示器成功显示了温湿度和亮度等信息。
在第四部分,也就是本文中,我们增加了天气预报等功能,完成了这个用起来非常方便的设备。当您打开Raspberry Pi的电源时,它会自动启动并执行自动检测和提醒等任务。
事实上,它现在每天都在我家工作,它会告诉我周围的亮度,并提醒我别忘了收回晒在外面的衣服!
鼓励大家也尝试制作方便您居家生活和在家办公的设备!
第2部分:用Raspberry Pi和传感器制作“可自动营造舒适空间的装置” 第二部分
第3部分:用Raspberry Pi和传感器制作“可自动营造舒适空间的装置” 第三部分
第4部分:用Raspberry Pi和传感器制作“可自动营造舒适空间的装置” 第四部分•剧终篇(本章)

吉田 显一(Yoshiken)
在普通公司工作的上班族,非常喜欢创作的周末创客,出版了电子书MESHBOOK,平时也写写博客。
http://blog.ktrips.net